

- When using FlashScan/AutoCal V3 in BBX mode (i.e. without a laptop/PC) to read or flash a controller, trace files are automatically saved when an error message is displayed on the device screen. If an error is not displayed on the device's screen then a trace file has not been automatically been saved. In that case you should manually save a trace file using the instructions shown below. You do not need to (and should not) manually save a trace file after an error has been displayed on the screen. That is because after a trace file is saved automatically, the trace buffers are cleared and any subsequently saved trace file will be empty.
- When using FlashScan/AutoCal V3 in pass-thru mode (i.e. with a laptop/PC) to read or flash a controller, trace files are automatically saved when an error message is displayed on the laptop/PC screen. If an error is not displayed on the laptop/PC screen then a trace file has not been automatically saved. In that case you should manually save a trace file on the laptop/PC and also manually save a trace file on the device using the instructions shown below.
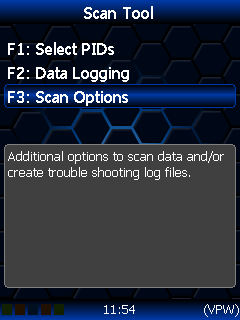
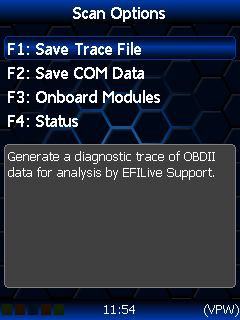
To manually save a trace file on FlashScan/AutoCal V3 navigate to Scan Tool -> F3: Scan Options -> F1: Save Trace.
FlashScan/AutoCal V3 maintain an internal buffer of the most recent messages sent to and received from the vehicle. That buffer is stored in RAM memory and is wiped clean each time the device is powered off or rebooted (and each time a trace file is saved). Therefore trace files can only be saved before powering off or rebooting the device which usually means before disconnecting from the vehicle.
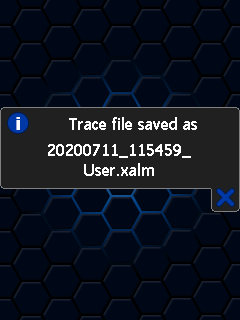
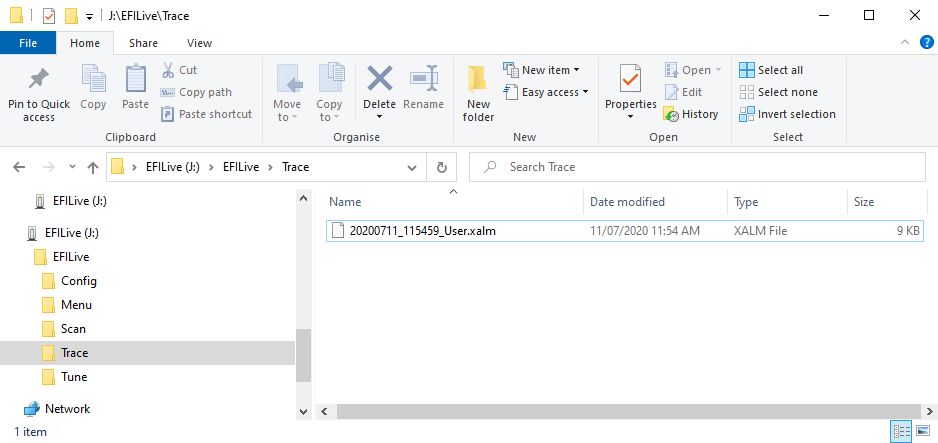
Trace files are located in the /EFILive/Trace folder on FlashScan/AutoCal V3. Trace files are named using the following naming convention:
yyyymmdd_hhnnss_<desc>.xalm, where:
- yyyymmdd: is the year, month and day that the trace was recorded.
- hhnnss: is the hour, minute and second that the trace was recorded.
- <desc>: is the description where;
- “User” means user generated trace files
- “xxx._x_$xxxx” identifies the 3 character controller ID, the communication process upload/download, and the 4 digit error code.
- xalm: is the file extension.
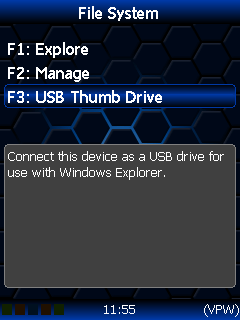
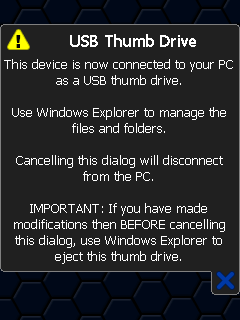
The trace file can be retrieved by connecting FlashScan/AutoCal V3 to your PC and navigating to Options-> F2: File System -> F3: USB Thumb Drive on the device to open FlashScan/AutoCal V3 in Windows Explorer.

User Defined Menu:
If you have a custom menu installed on your device, the option to save a trace file may not be as described above. In that case, follow the instructions provided by your Tuner to save a trace file, alternatively you can temporarily revert to the Standard menu to use the instructions above. To revert to the standard menu;
- Connect FlashScan/AutoCal V3 to PC.
- Launch the EFILive V8 Scan and Tune software.
- Navigate to [F6: Devices] -> [F5: Options].
- Select [Disable Custom Menu] to revert to the Standard Menu.
- To restore the custom menu select [Enable Custom Menu].