

Device Settings manage a range of user configuration options for FlashScan and AutoCal hardware. Device settings can be accessed via EFILive V8 Scan and Tune software, or via FlashScan and AutoCal menus.
Device Setting Configuration
There are 2 different methods to access Device Settings. To access these;
- Connect your FlashScan or AutoCal to your PC.
- Open the EFILive V8 Scan and Tune application, and then select either:
- Select the [F6: Devices] option in the left-hand pane; or
- Select the [F5: BBX] -> [F6: Quick Setup] menu and select the correct hardware option from the Edit AutoCal V3 Settings button.
Both menu options perform the same function, however the option via the [F5: BBX] -> [F6: Quick Setup] allows these settings to be programmed in a single process along with all other BBX settings, including scan and tune configurations, along with tune files. The option via [F6: Devices] only programs device settings. Other BBX settings need to be programmed independently.
SD Card, Date Format, Timing and LED Mode Configuration
Navigate to the Device Settings option using either of the above methods;
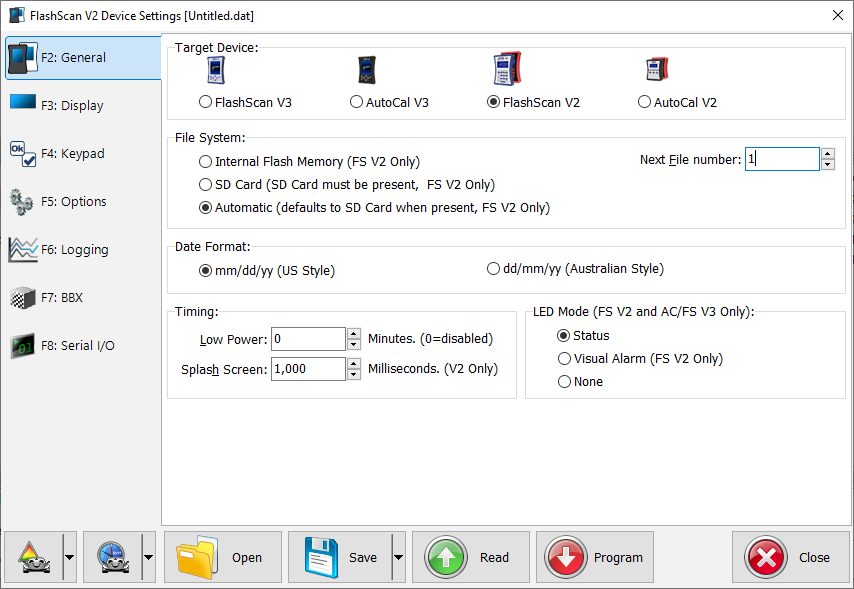
- Select [F2: General] to manage the following options:
- Target Device - select the device to programmed if multiple devices are connected to your PC. Making this selection activates options applicable for the chosen device, and deactivates options that are not applicable to the chosen device.
- File System - configures FlashScan V2 to use either internal memory or SD Card.
- Date format - US Style or Australian Style.
- Timing - Low Power notification, length of time Splash screen displays.
- LED Mode - configures status display, visual alarm or none.
- Select appropriate options.
- Program FlashScan or AutoCal using the [Program] option, or
- Select Close to return to the Quick Setup, select Include current device settings, and [Program Quick Setup].
Display Configuration
Navigate to the Device Settings option using either of the above methods;
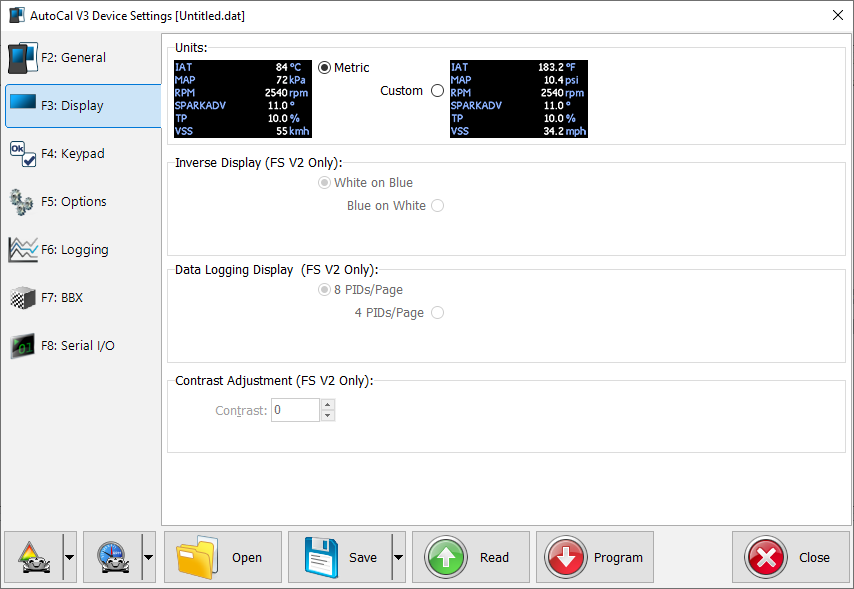
- Select [F3: Display] to manage the following options:
- Units - Metric or Custom display units.
- Inverse Display - sets screen color combinations for FlashScan V2.
- Data Logging Display - sets the number of PID's per page display for FlashScan V2.
- Contrast Adjustment - adjusts the contrast for FlashScan V2 with a blue case.
- Select appropriate options.
- Program FlashScan or AutoCal using the [Program] option, or
- Select Close to return to the Quick Setup, select Include current device settings, and [Program Quick Setup].
Keypad Configuration
Navigate to the Device Settings option using either of the above methods;
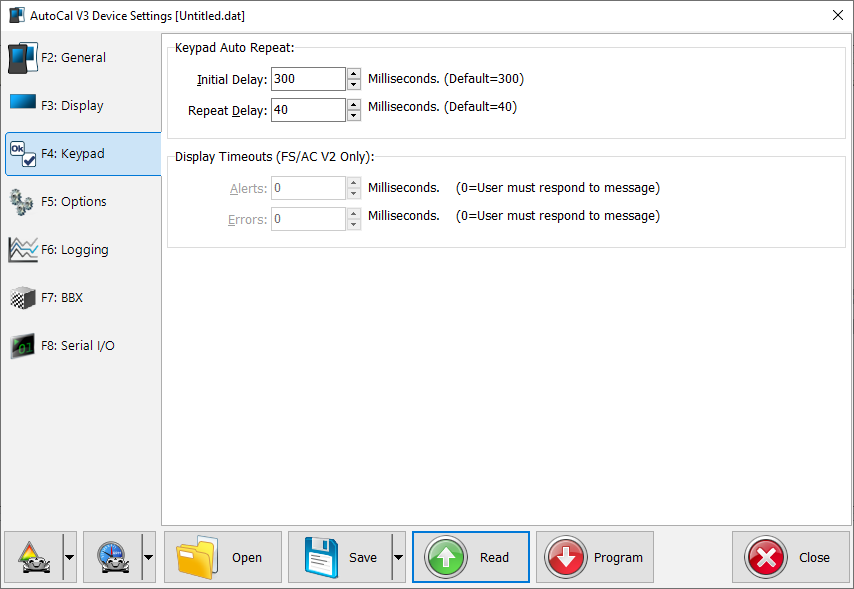
- Select [F4: Keypad] to manage the following options:
- Keypad Auto Repeat.
- Display Timeouts.
- Select appropriate options.
- Program FlashScan or AutoCal using the [Program] option, or
- Select Close to return to the Quick Setup, select Include current device settings, and [Program Quick Setup].
Menus, Splash Screens, Options, and Common Settings
Navigate to the Device Settings option using either of the above methods;
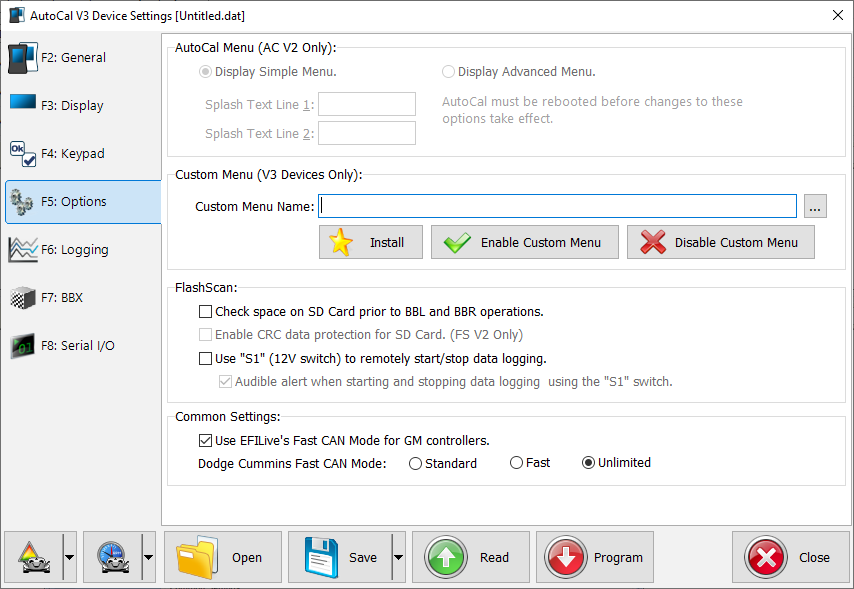
- Select [F5: Options] to manage the following options:
- AutoCal Menu - set Simple Menu, Advanced Menu, and Splash Screen text for AutoCal V2.
- Custom Menu - install, enable or disable custom menus for FlashScan/AutoCal V3.
- FlashScan - Check SD card space, enable data protection for SD card, S1 switch for logging.
- Common Settings - set EFILive's FAST CAN Mode for GM controllers, and Dodge Cummins Fast CAN Mode.
- Select appropriate options.
- Program FlashScan or AutoCal using the [Program] option, or
- Select Close to return to the Quick Setup, select Include current device settings, and [Program Quick Setup].
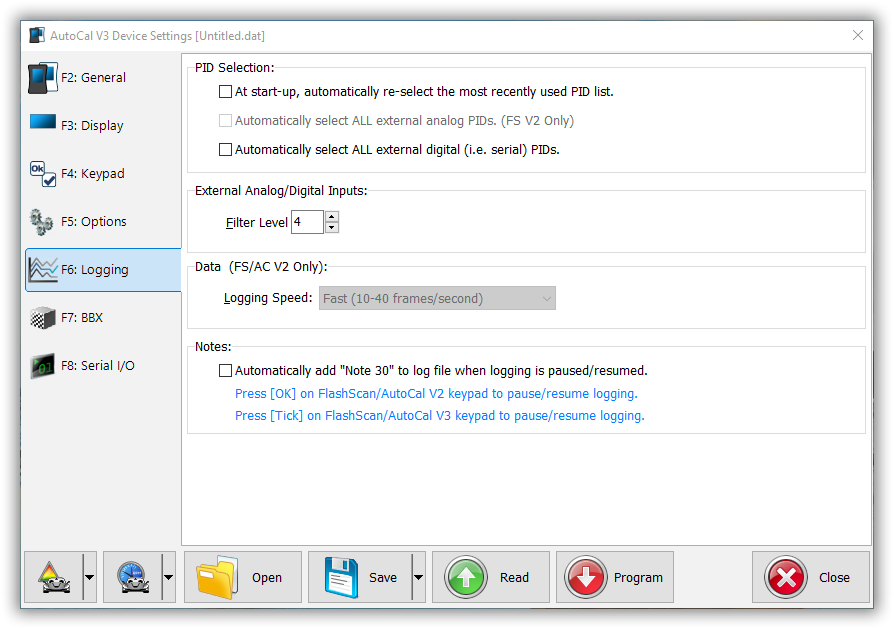
Logging Configuration
Navigate to the Device Settings option using either of the above methods;
- Select [F6: Logging] to manage the following options:
- PID Selection - set PID configuration options.
- Analog/Digital Inputs - set filter levels.
- Data - set logging speed for FlashScan/AutoCal V2.
- Notes - configure to add "Note 30" to log file when log is paused/resumed.
- Select appropriate options.
- Program FlashScan or AutoCal using the [Program] option, or
- Select Close to return to the Quick Setup, select Include current device settings, and [Program Quick Setup].
BBX Configuration
Navigate to the Device Settings option using either of the above methods;
- Select [F7: BBX] to manage the following options:
- BBL - PID validation configuration for FlashScan/AutoCal V2.
- BBR and BBF verification and display options.
- Perform extended verification of uploaded file.
- Display OBDII retry statistics after Read/Flash is complete for FlashScan V2.
- Display folders when selecting tune files for flashing.
- Automatically save trace files if read or flash fails.
- BBX Options - Display Switchable tune selections on AutoCal V2's simple menu.

- Select appropriate options.
- Program FlashScan or AutoCal using the [Program] option, or
- Select Close to return to the Quick Setup, select Include current device settings, and [Program Quick Setup].
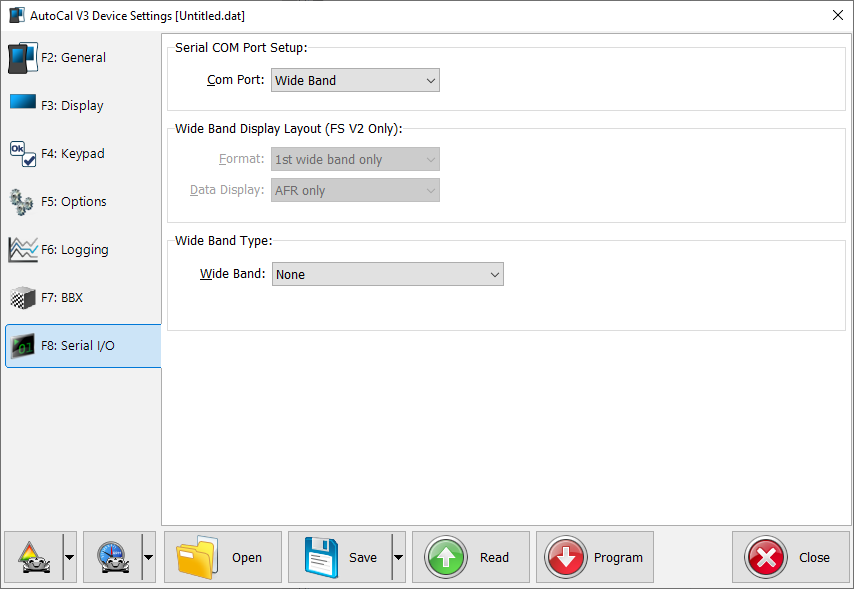
Serial Comm Port and Wideband Configuration
Navigate to the Device Settings option using either of the above methods;
- Select [F8: Serial I/O] to manage the following options:
- Serial COM Port Setup - select None, Wide Band or External Data Logger.
- Wide Band Display Layout - set format and data display for FlashScan V2.
- Wideband Type - select from a list of supported Wide Band devices.
- Select appropriate options.
- Program FlashScan or AutoCal using the [Program] option, or
- Select Close to return to the Quick Setup, select Include current device settings, and [Program Quick Setup].
-
AutoCal Device Configuration
Device Settings manage a range of user configuration options for AutoCal hardware. Device settings can be accessed via V8 Scan and Tune software using the information provided above, or via the AutoCal menu.
To edit the Device Settings directly on the AutoCal;
- Hold Next key to activate advanced menu while connecting AutoCal to your vehicle.
- Using the [Prev] and [Next] buttons, navigate to the [AutoCal Options] -> [Edit Settings] menu to manage the following options:
- Set Pro Menu - select Yes for Advanced Menu, No for Simple Menu.
- Set File #
- Set Locale - Locale USA or Locale Non-USA.
- Set Units - Metric or Custom (Imperial).
- Set MRU PIDs - Yes or No.
- Set Scan Rate - Fast, Medium or Slow.
- Set Note 30 - Yes or No.
- Set Fast CAN - Yes or No.
- Set Skip Verify - Yes or No.
- Set Verify BBR - Yes or No.
- Set BBX Status - Yes or No.
- Set BBX Directory - Yes or No.
- Set Switches - enables switchable tuning on simple menu - Yes or No.
- Set Trace - Yes or No.
- Set COM Port - Wideband O2, External, or Unknown.
- Set WO2 Type - select Wideband type from list.
- Set WO2 Format - Bank 1, Bank 2, Both.
- Set WO2 Data - AFR, Lamda, EQ Ratio, AFR & EQ, AFR & L, EQ & L.
- Set WO2-1 ID - set number.
- Set WO2-2 ID - set number.
- Set Stoich - set value.
- Set Low Power - set warning to display in 10 minute increments or disable.
- Set Splash Screen - set splash screen display times in 1,000ms
- Set Alert - time in 1,000ms.
- Set Error - time in 1,000ms.
- Set AR Delay - time in 300ms.
- Set AR Speed - time in 40 ms.
- Use the [Prev] button to return to the top of the list and select [Exit] to return to [AutoCal Options Menu].
- The following menu options are also available from the [AutoCal Options] menu:
- Restore Settings - returns settings to factory defaults.
- Set Date and Time - edits date and time settings.
- Browse Files - view files saved on the AutoCal.
- Delete Files - deletes files on the AutoCal.
- Free Space - displays used and available space.
- Format File Sys - Formats the file system.
-